Need to remove the vocals from a song? Audacity just might be the answer. It's one of the few free audio editing programs out there with many, many features, making it simple to create a track for karaoke or simply to listen to an instrumental version.
Removing vocals from any song is a super-easy process, so let's get right to it. Start by, of course, downloading and installing Audacity for free, which is available for Windows, Mac, and Linux. Note I'll be using the Windows version, but the steps will be similar if not exactly the same for Mac and Linux versions.
Load Audio File into Audacity
Open Audacity, then choose File -> Open and select the track you wish to remove vocals from.
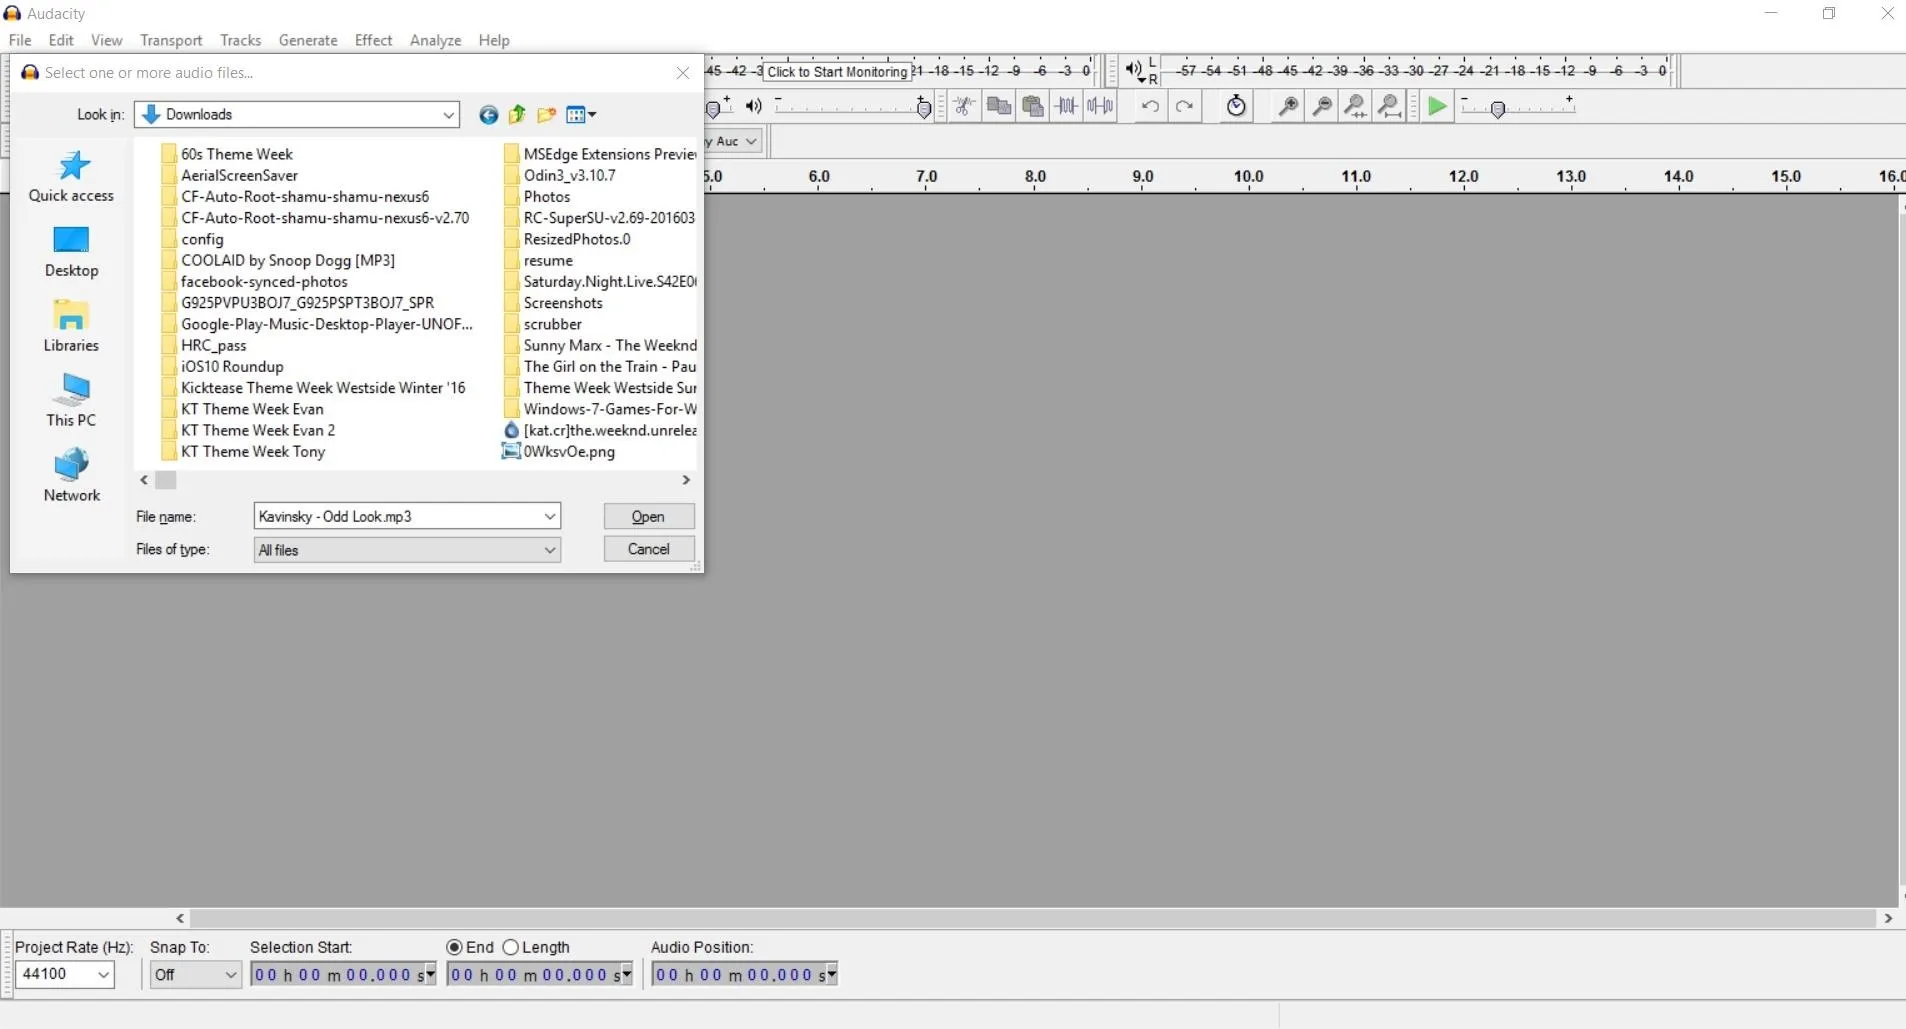
Split the Track
Once your track is loaded into Audacity, select the drop-down menu for the track, then choose the option to Split Stereo Track.
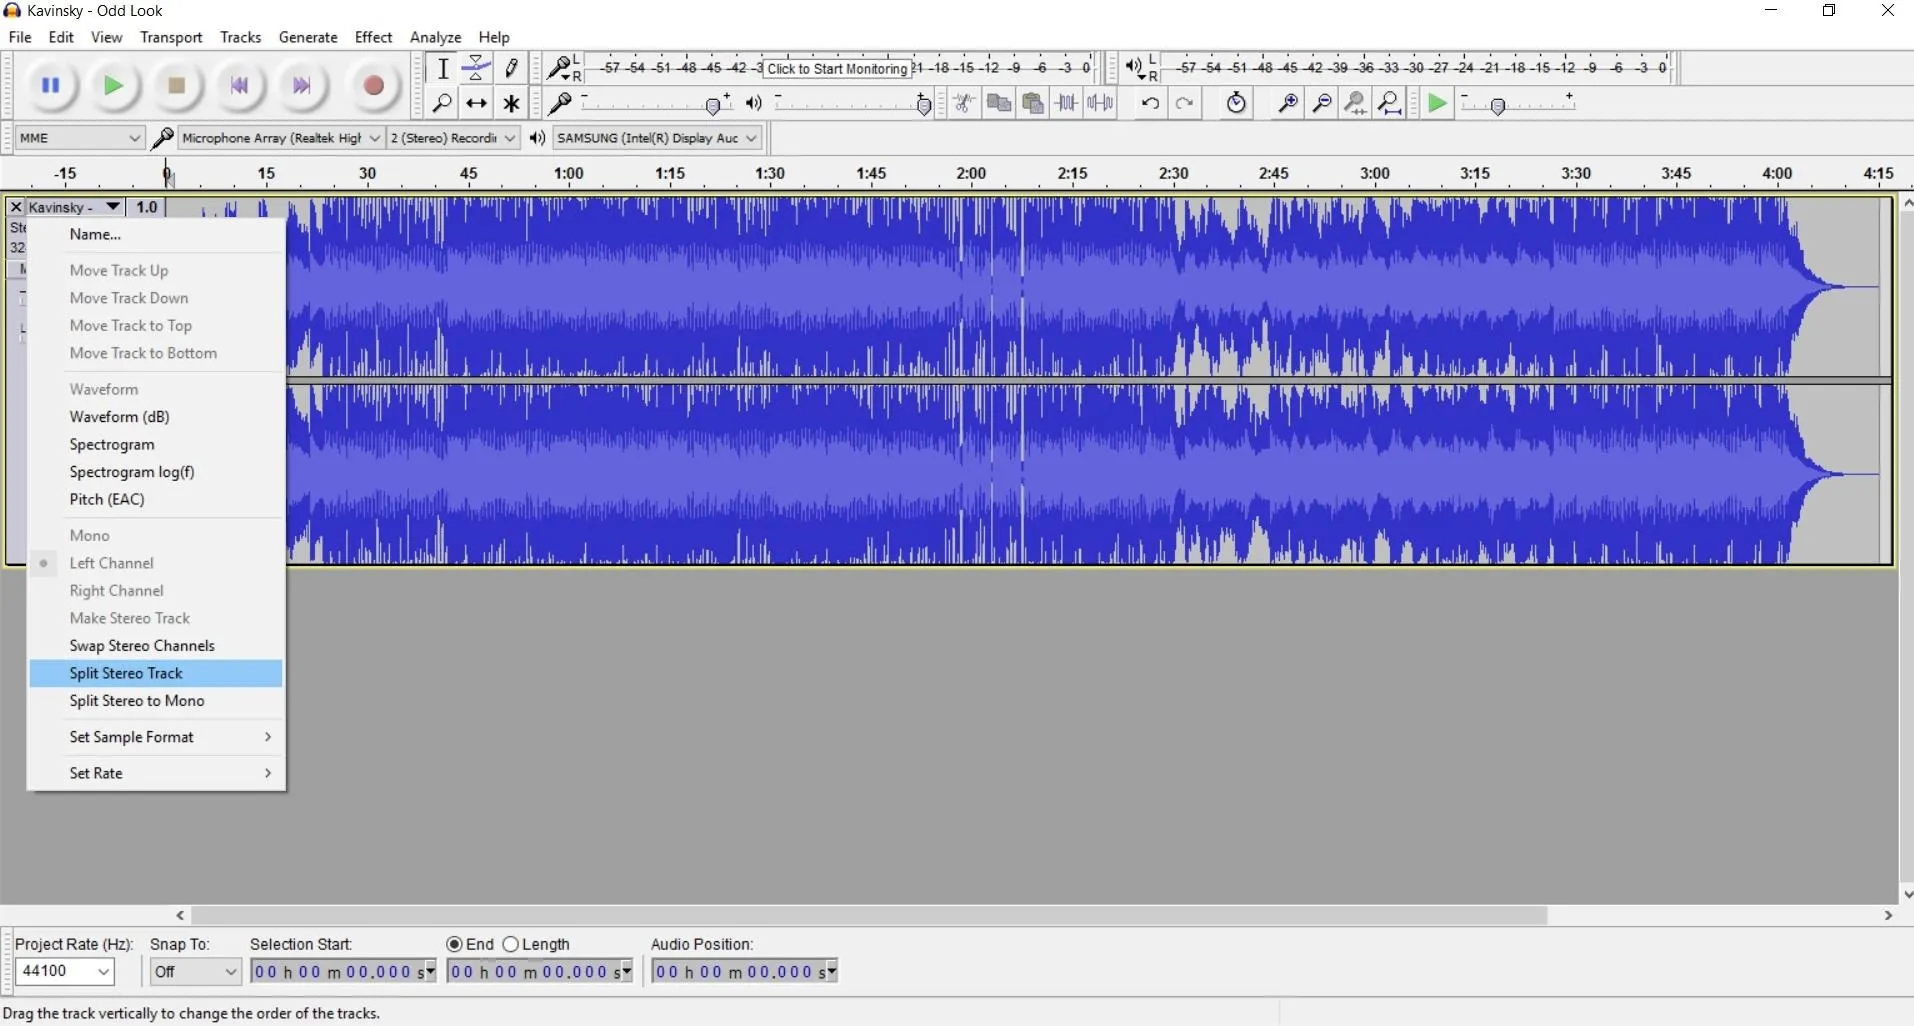
Now your song is split into its left and right channels.
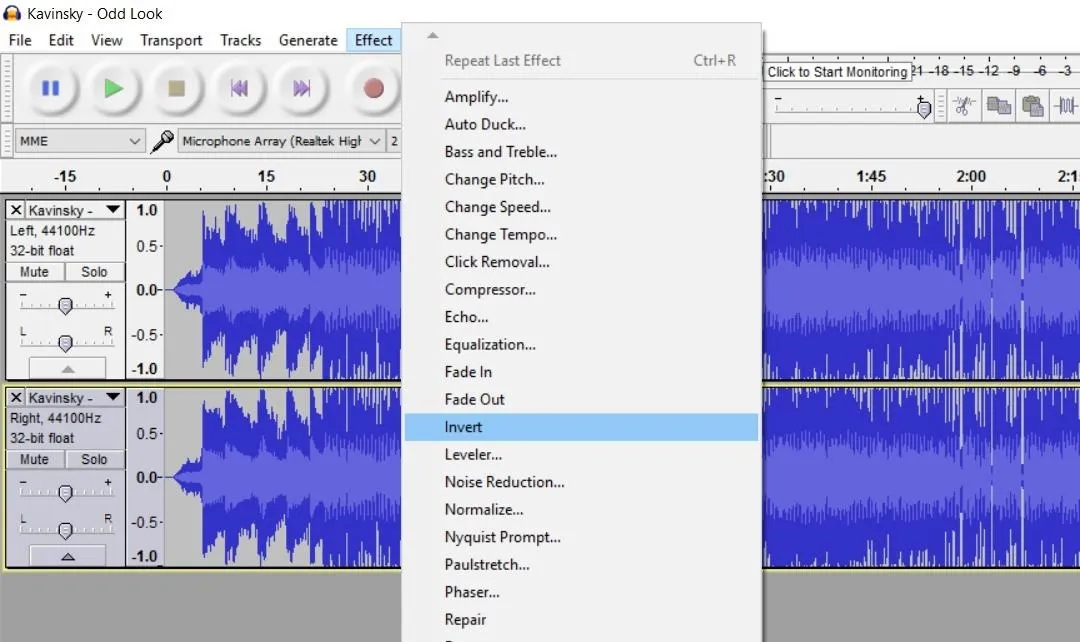
Invert Bottom Channel
Click on the bottom channel to select it, then choose the option for Effect -> Invert from the menu bar.
Set Each Track to Mono
We're almost done! Last thing to do is to set each track as mono. Select the drop down option for the top track, then choose Mono. Now do the same for the bottom track.
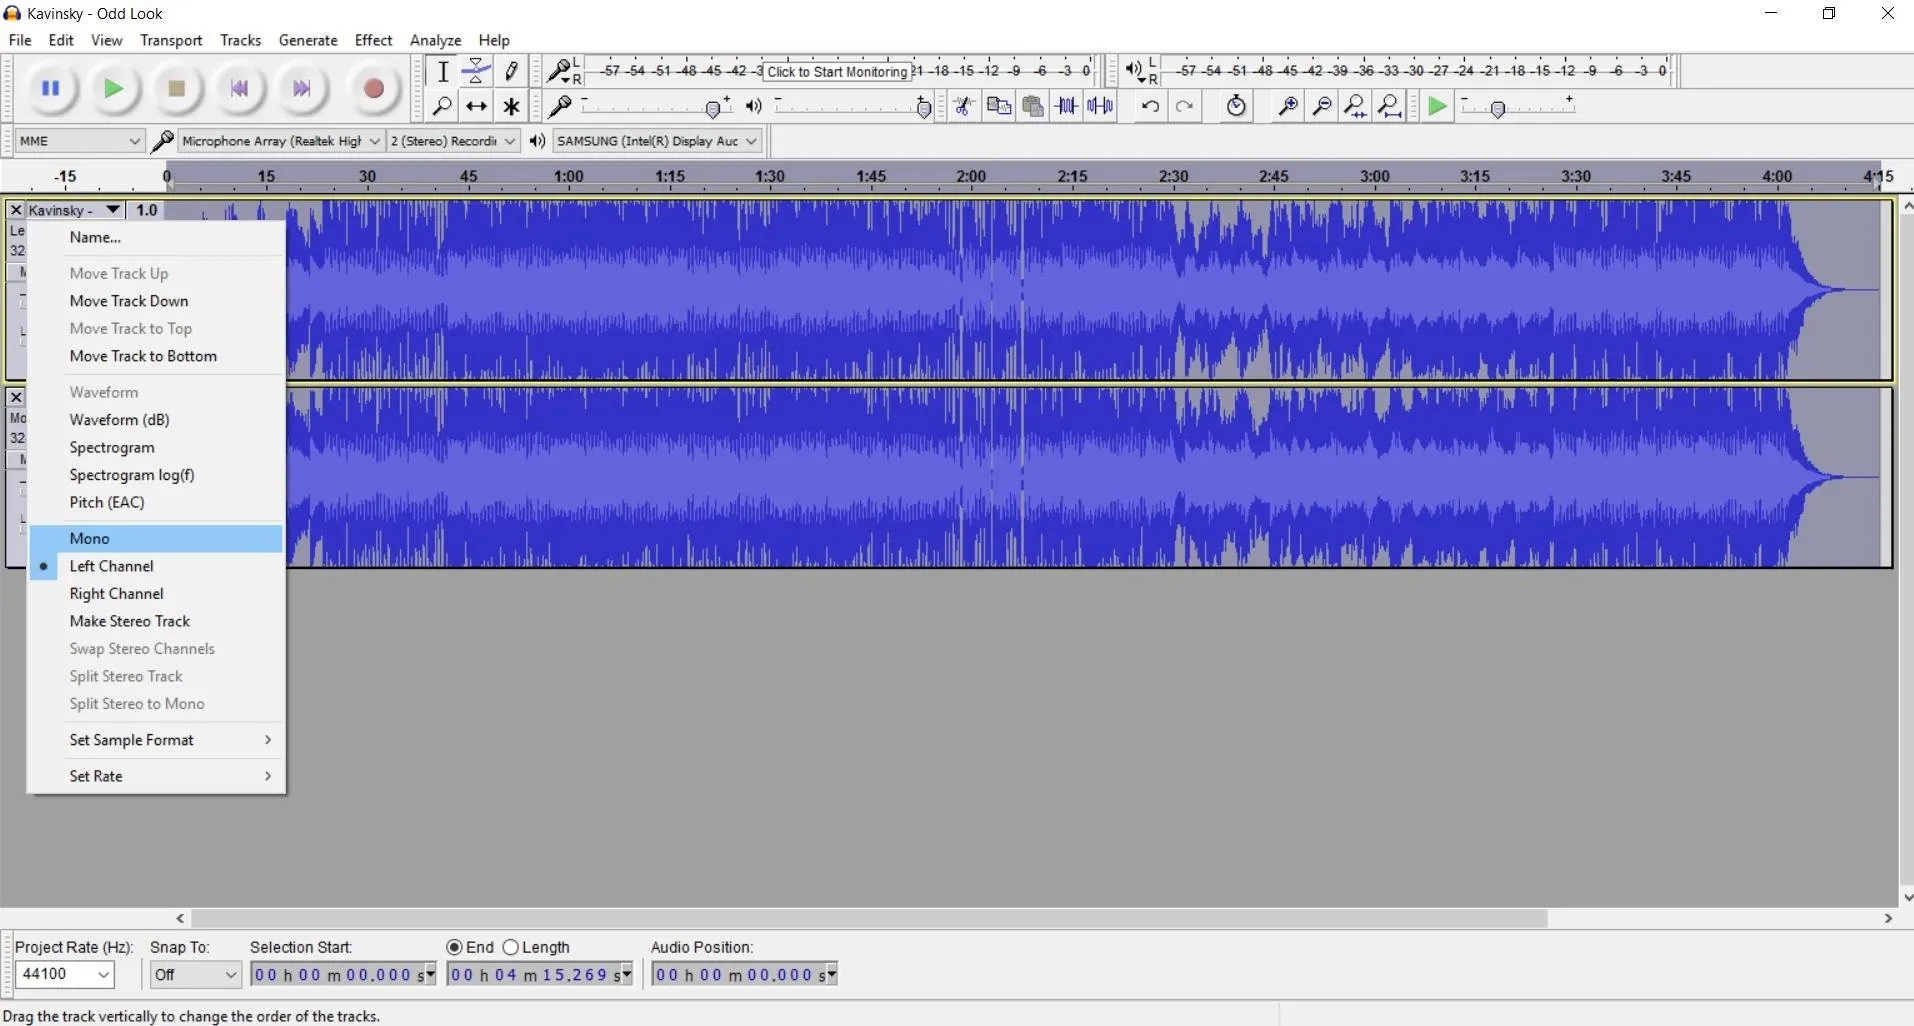
That's it! Now you can choose File from the menu bar and save the track.
One Final Tip
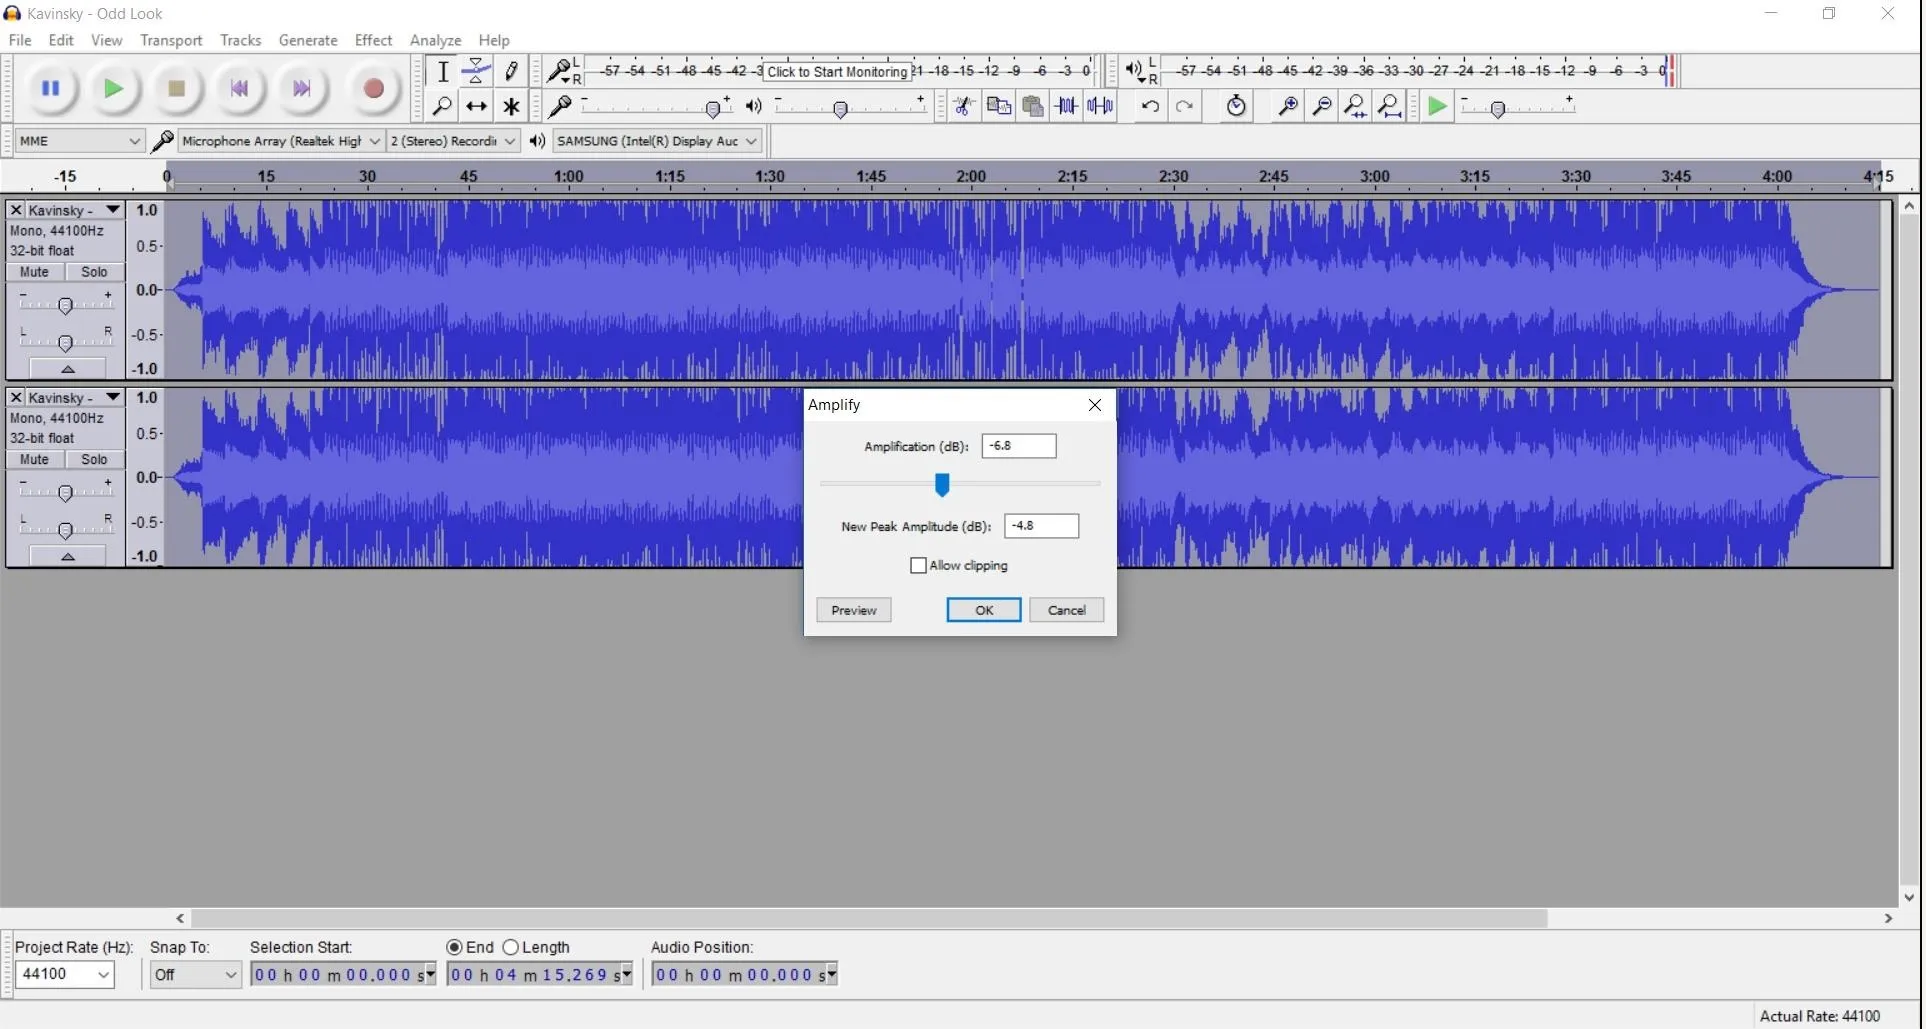
You may notice you can still barely hear the vocals. If that's the case, go to Effect -> Amplify and choose a negative level value—you'll want to play around with the exact values until you find one that works best for your specific track.
For a video guide, check out the tutorial below.
Cover photo and screenshots via WonderHowTo


Comments
Be the first, drop a comment!